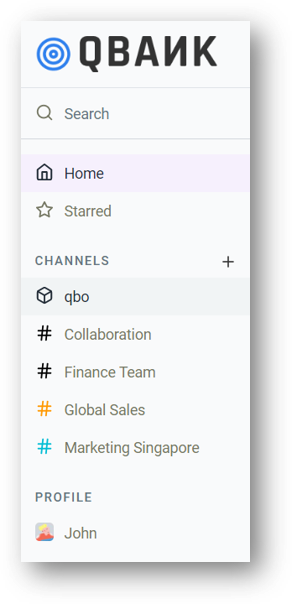
Channels
A channel is a place where a team or an individual can create threads that allows them to interact with qbo (the bot) to work towards a common goal. Channel can be a project, activity, or topic. It can be set to either private or public, based on the channel author’s need.
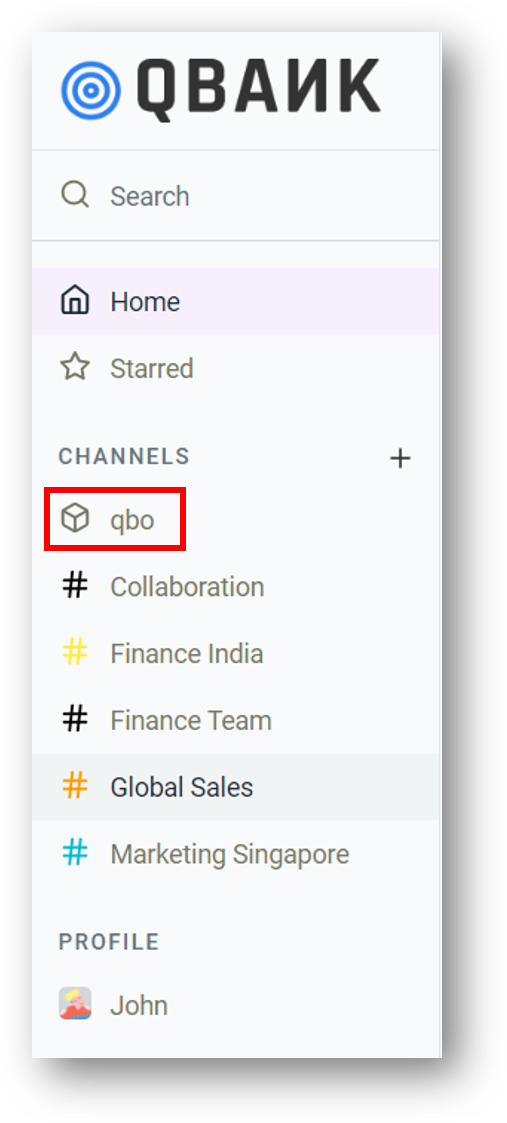
qbo
qbo is the default channel that gets created with the installation of the qbo insights. The qbo channel allows the user to have private conversations with qbo (the bot), where the user can pose queries , get results, and create boards. Multiple threads can be created or deleted in this channel (as in any other channel).
Channel
Related Videos
Collaborate with your colleagues on qbo
To create a new thread, refer Create.
To delete a thread, refer Delete
Note
qbo channel cannot be deleted, updated, or archived unlike custom channels.
Create
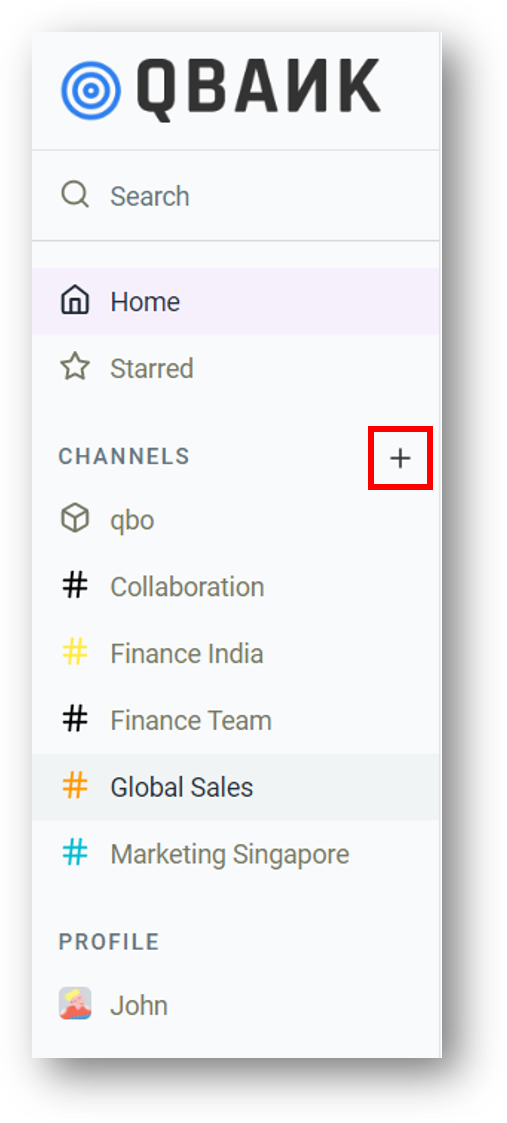
Apart from the default qbo channel, qbo insights allows user to create a custom channel as per the user’s preferences. All the custom channels get listed below CHANNELS in the left pane. These custom channels are easy to recognize as they appear with a hashtag beside its name.
There are two approaches to create a custom channel.
1. CHANNELS > Browse channels > Create a new channel
2. Click ![]() > Create a new channel
> Create a new channel
Let’s see it in detail:
1. CHANNELS > Browse channels > Create a new channel
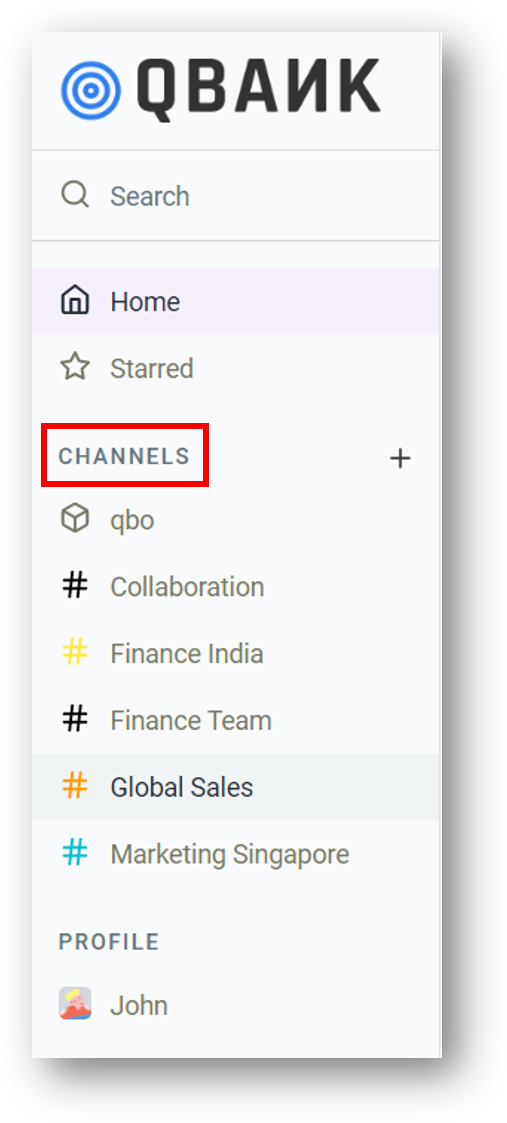
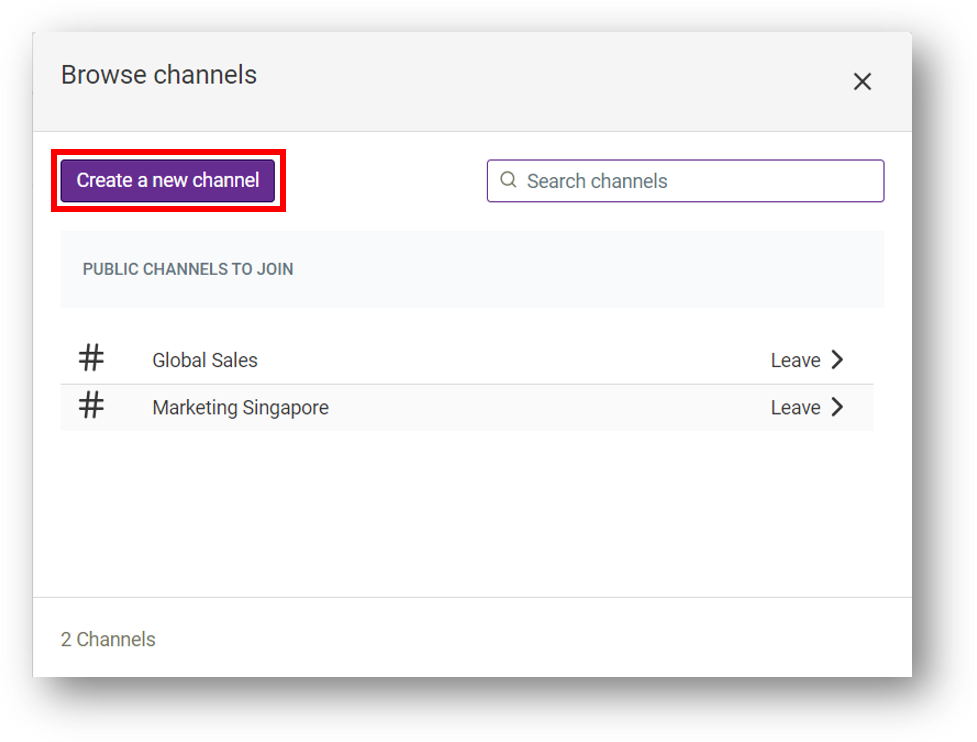
Step 1. Click CHANNELS in the left pane.
Step 2. Browse channels dialog-box opens. The Browse channels dialog-box also allows user to search for other public channels and join it. The user also gets an option to leave a particular public channel.
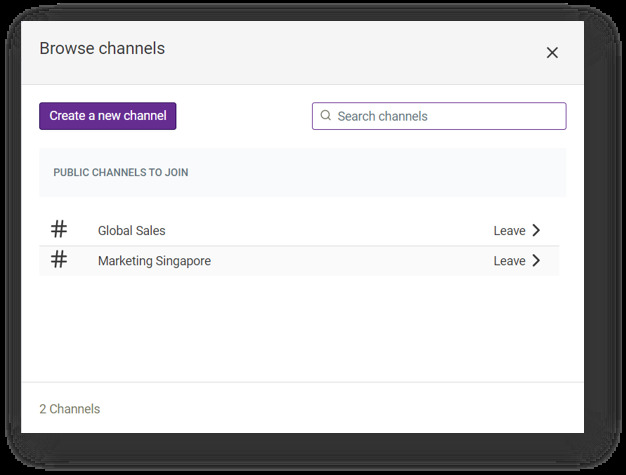
Step 3. Click Create a new channel button.
2. ![]() > Create a new channel
> Create a new channel
Step 1. Click ![]() .
.
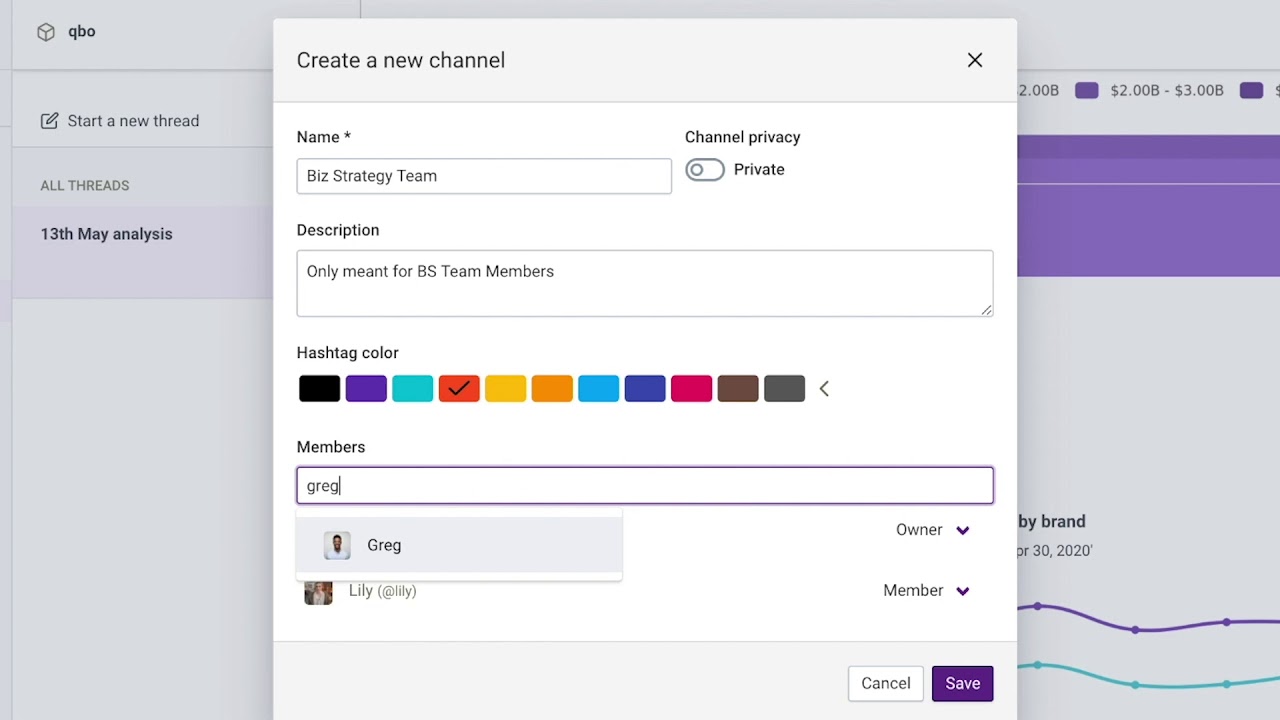
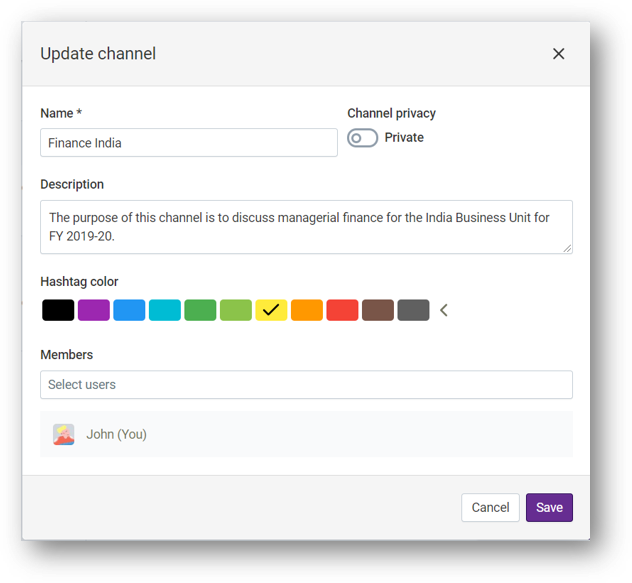
Step 2. Create a new channel dialog box opens.
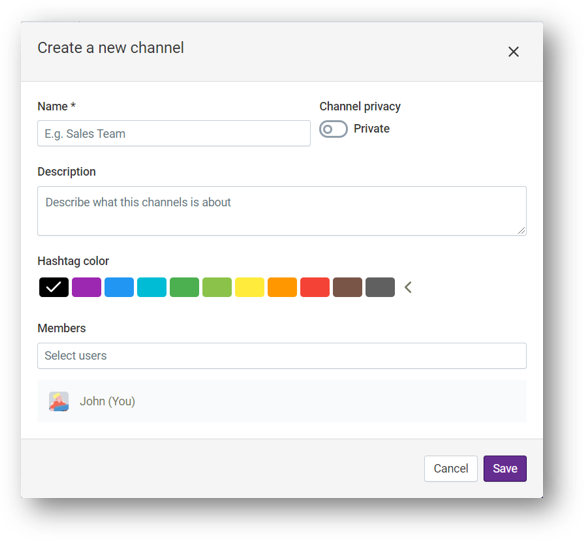
Step 3. Enter the Name and Description for the channel in the respective fields. Note that Name is a mandatory field.
Step 4. Click the button below Channel privacy to set the privacy of the channel as either Public or Private. By default the privacy of the channel is set to Private.
Step 5. Click the color box below Hashtag Color to change the color of the hashtag. By default the hashtag color is set to Black.
Step 6. Click the Members field to add users to the new channel and to create collaboration with qbo (the bot). The newly added users appear below Members field. By default, the user with which you are creating a new channel is the member of that channel. If you wish to delete a particular member, click the name and it will get deleted. (Refer: Add/Delete users)
Step 7. Click Save to create a new channel.
Step 8. Click Cancel to discard channel creation.
Add/Delete users
In qbo insights, user can add multiple users to an existing custom channel under Members field to create a collaboration between the users and the qbo (the bot). Users can be added while creating a new channel too. (Refer: Create)
To add users to an existing channel:
Step 1. Select a channel from the left pane.
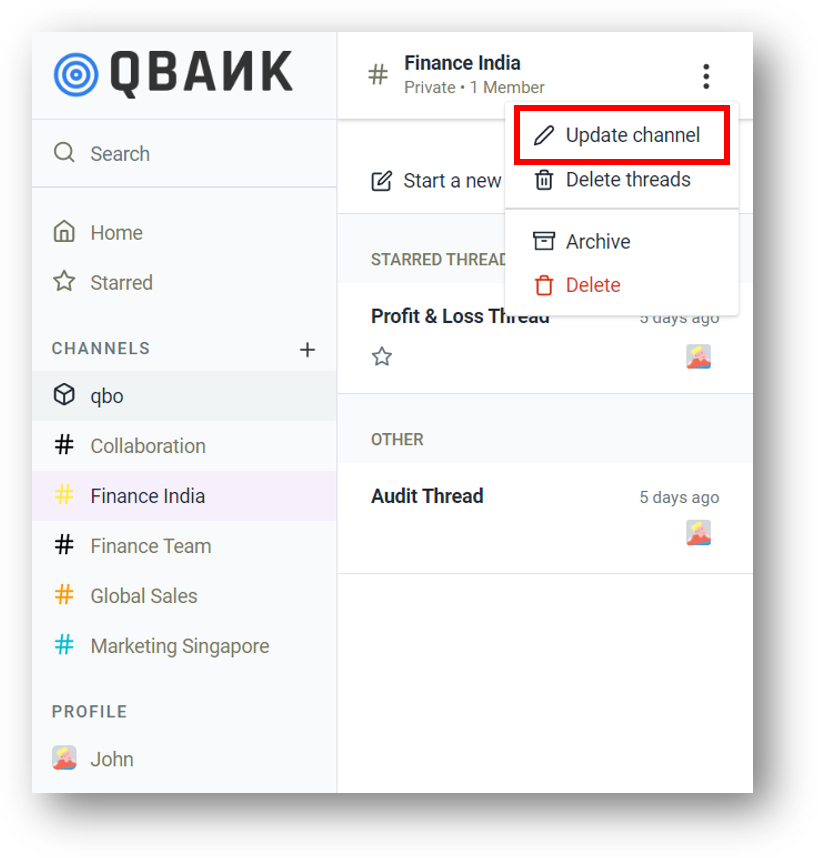
Step 2. Click ![]() > Update channel.
> Update channel.
Step 3. In the Update channel dialog box, click the Members field and type the user name to select a user you wish to add.
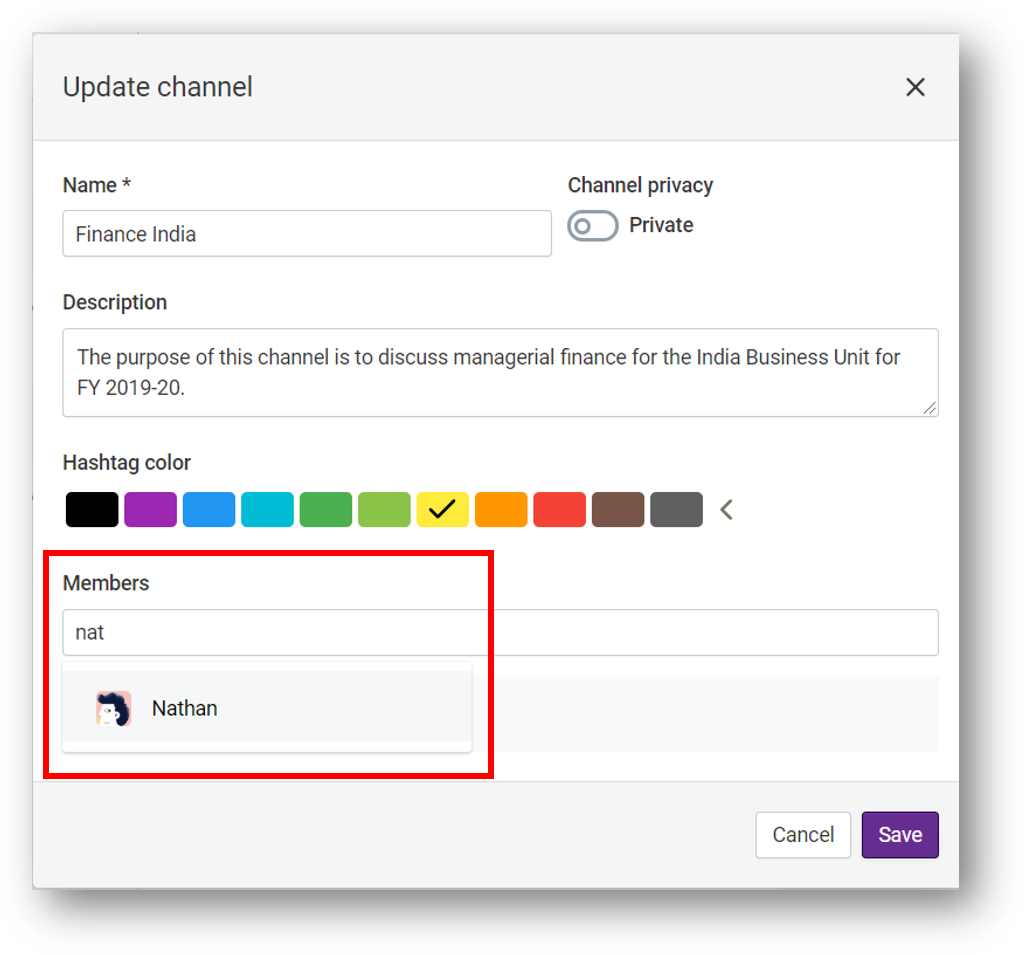
Step 4. Click Save.
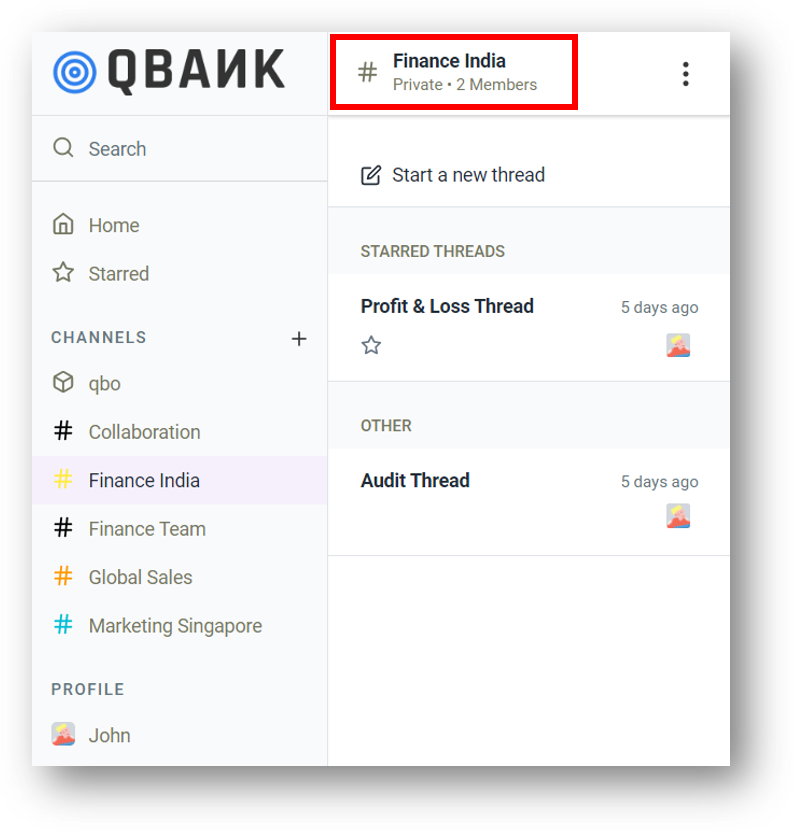
Note that the number of members is increased by one number.
To delete users:
Step 1. Select a channel from the left pane.
Step 2. Click ![]() > Update channel.
> Update channel.
Step 3. In the Update channel dialog box under Members field, hover over the mouse on the user name and click to delete that user.
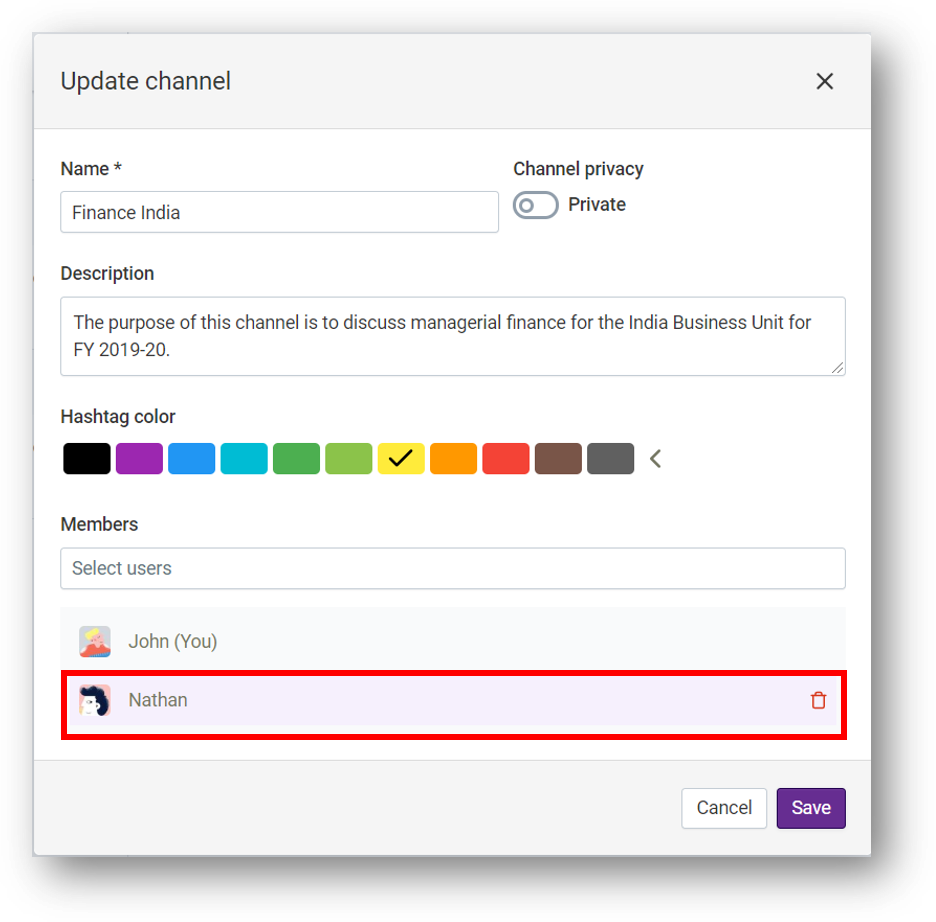
Step 4. Click Save.
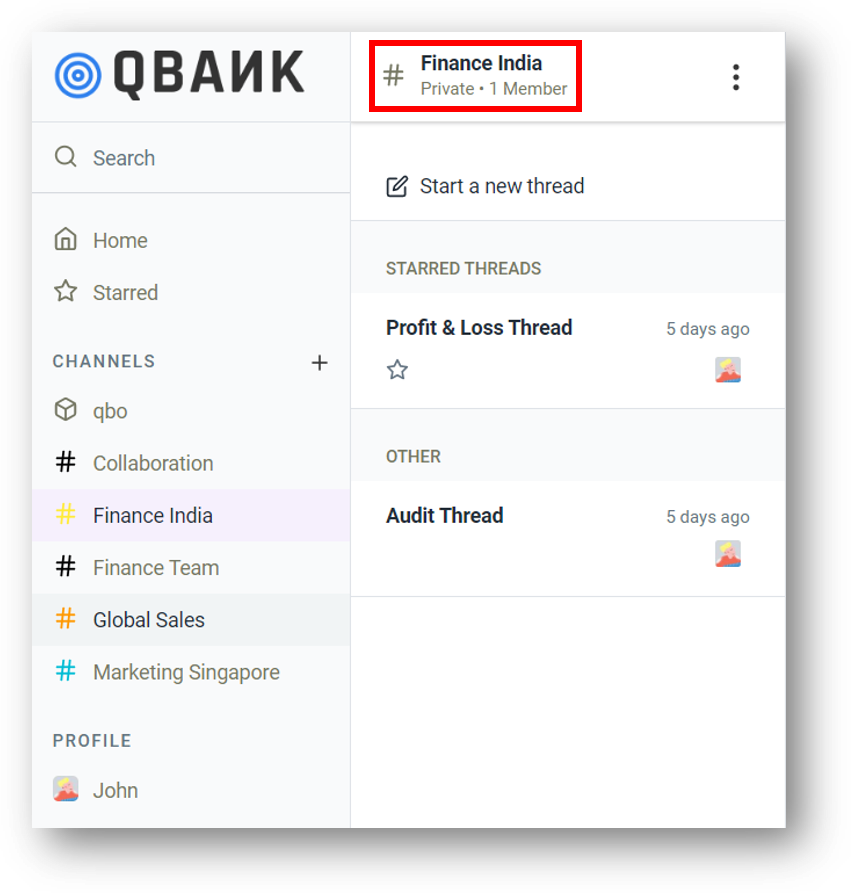
Note that the number of members is decreased by one number.
Update
To update or edit a custom channel:
Step 1. Click ![]() > Update channel.
> Update channel.
Step 2. In the Update channel dialog box, edit the fields such as:
Name
Description
Channel privacy
Hashtag color
Add or delete users from Members field. (Refer: Add/Delete users)
Step 3. Click Save.
Archive/Un-archive
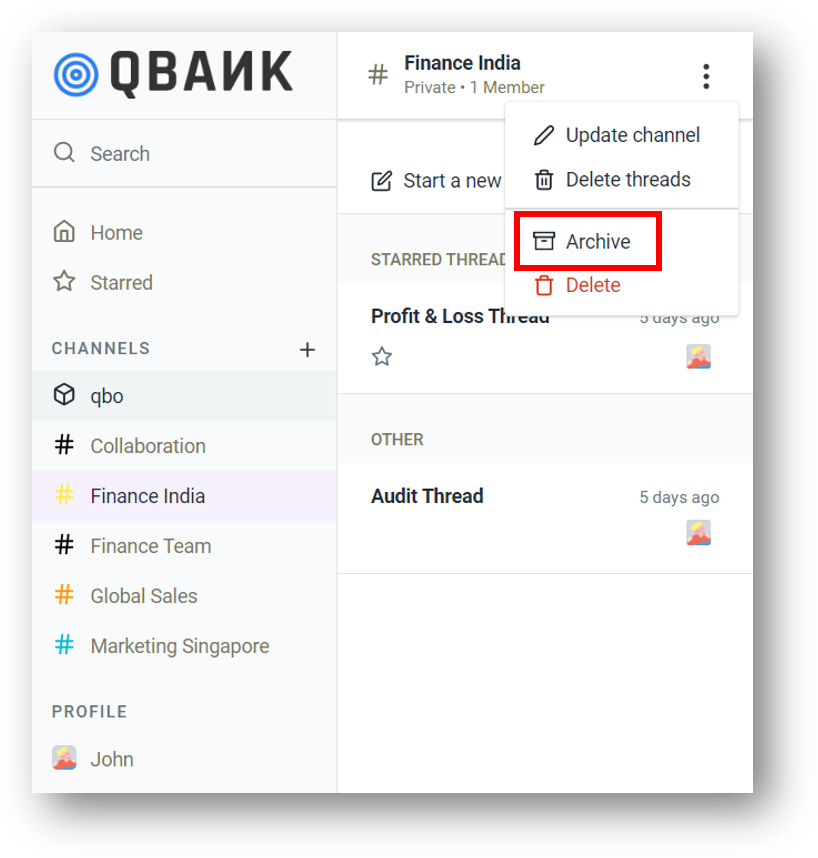
To archive a custom channel:
Step 1. Click ![]() > Archive.
> Archive.
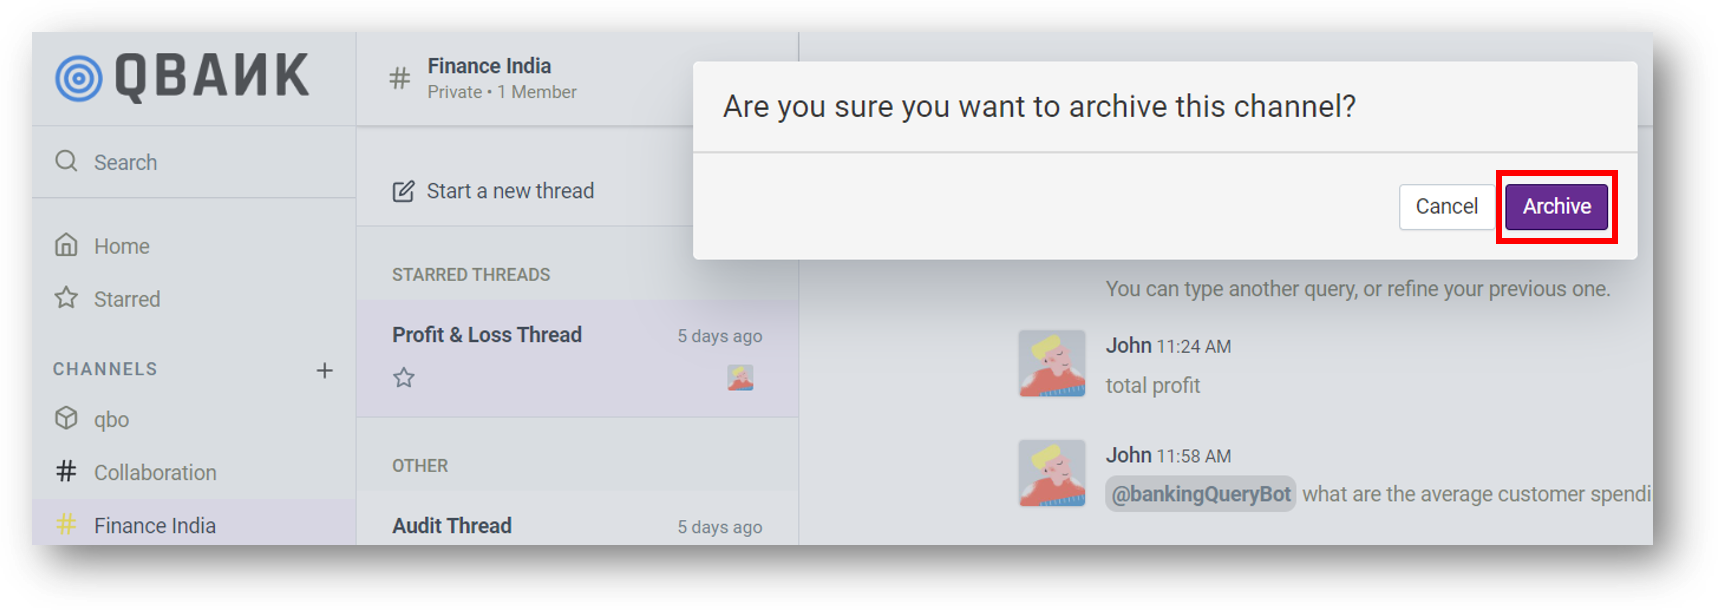
Step 2. Click Archive button to confirm Are you sure you want to archive this channel? message box.
Archived channels folder gets created in the left pane.
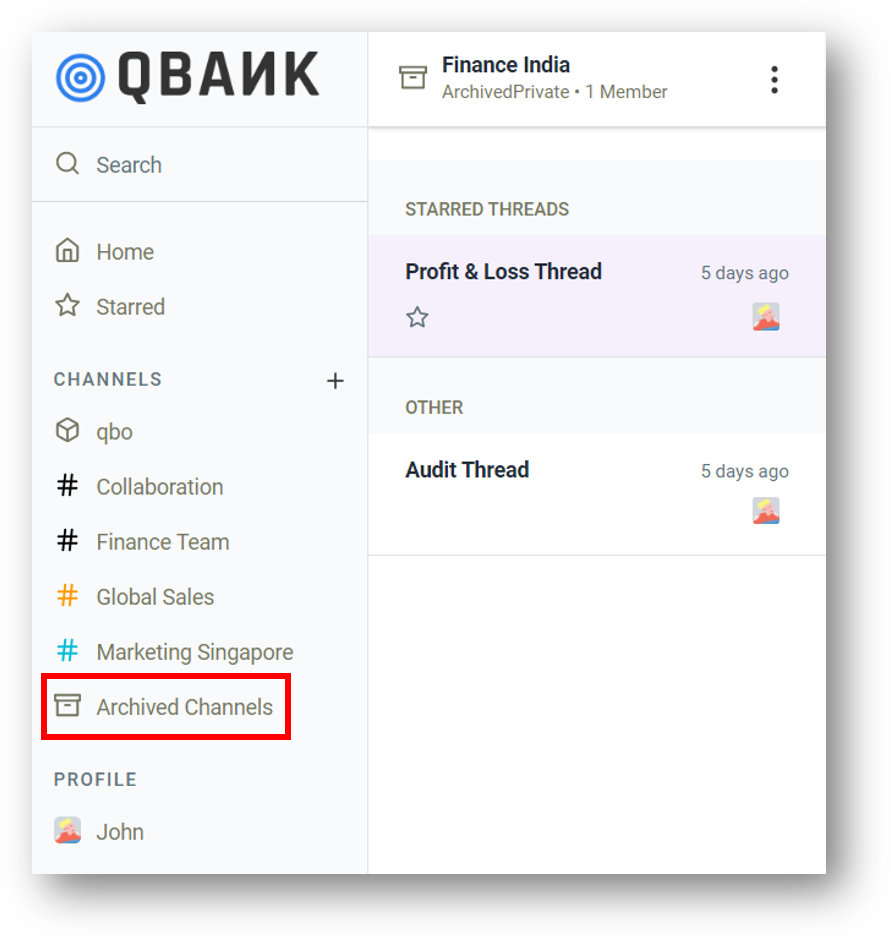
Step 3. Click Archived channels folder to see archived channels.
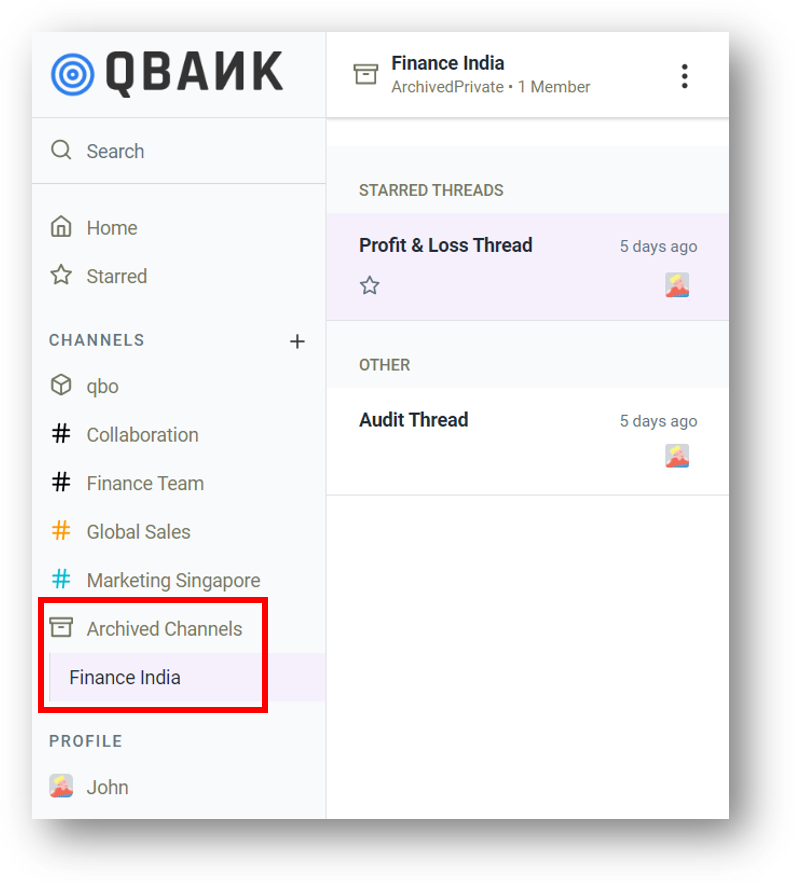
To un-archive a channel:
Step 1. Click the channel name under Archived channels.
Step 2. Click ![]() > Un-archive.
> Un-archive.
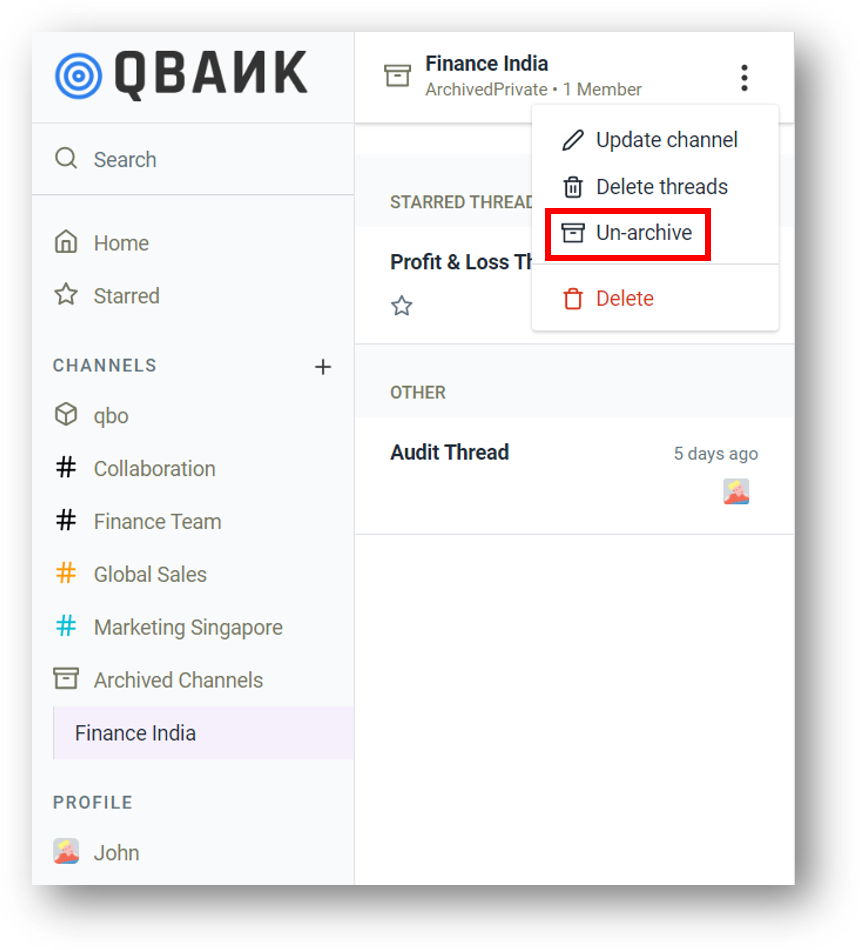
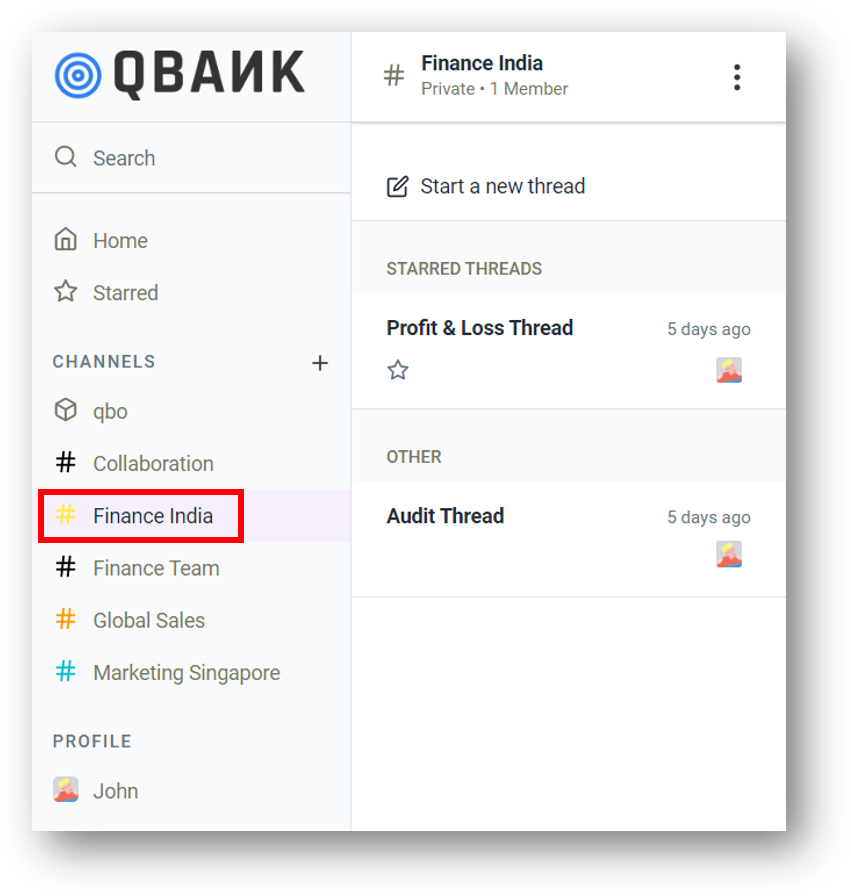
The channel will re-appear under the CHANNELS list.
Delete
To delete a channel:
Step 1. Click ![]() > Delete.
> Delete.
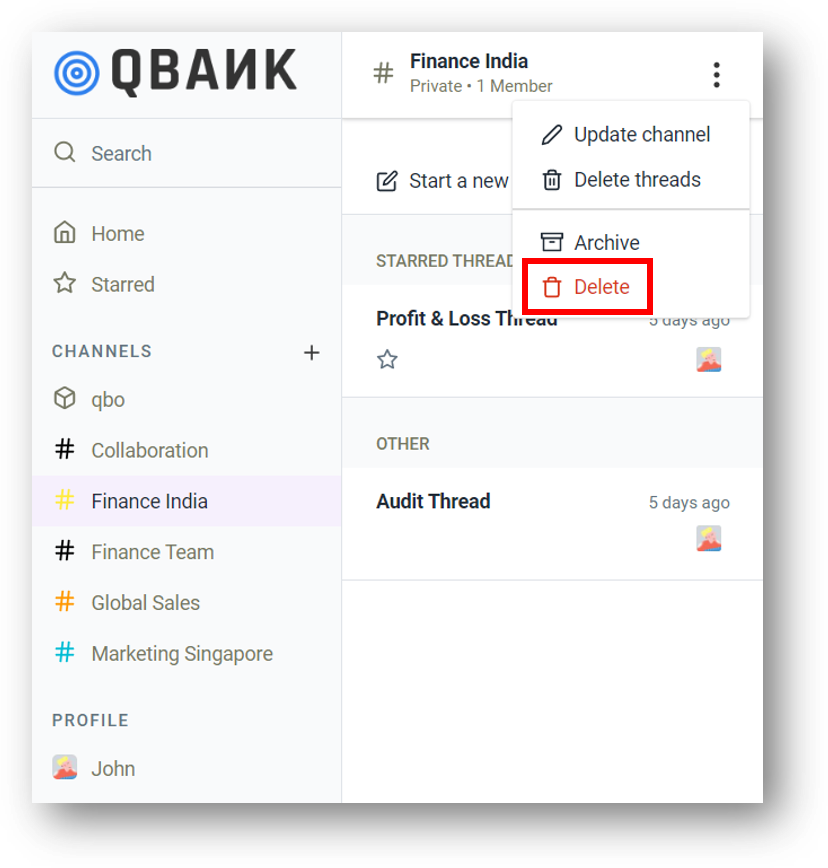
Step 2. Click Delete button to confirm Are you sure you want to delete this channel? message box.
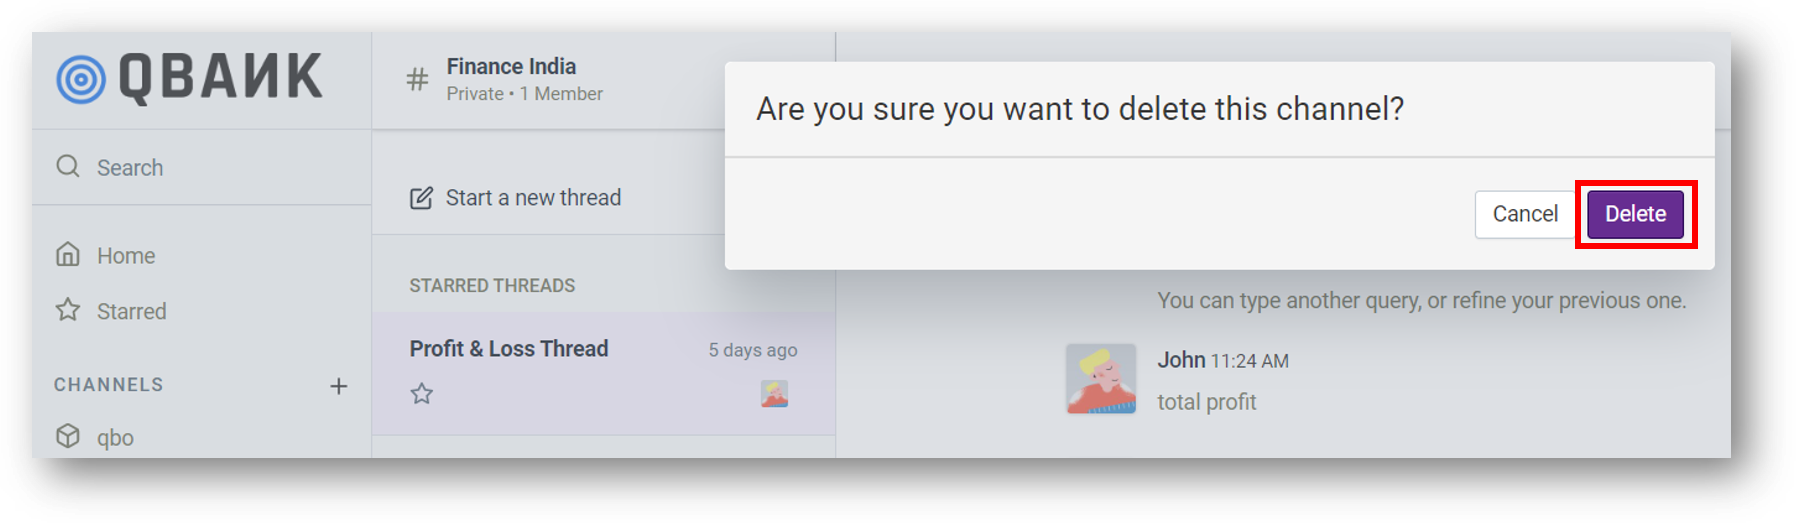
The channel gets deleted permanently.
Attention
All the channels that have been created will be visible in the admin panel.